These
notes are given in good faith for general guidance purposes
Other help sheets & tips are available via the
instructions & guides link above.
|
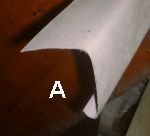
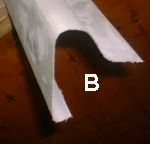
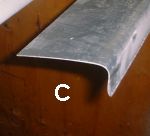
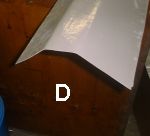
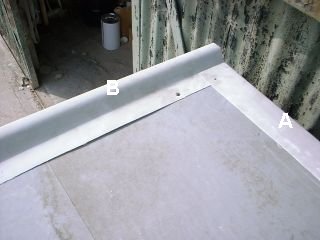
ABL (STEVENS) Resin & Glass Unit 4, Millbuck Way, Springvale Ind Est, Sandbach, Cheshire CW11 3HT, Tel/Fax: 01270 766685/529111 ROOF SHEATHING The following sheets explain the procedures necessary to weatherproof a flat roof using chopped strand mat and resin. This procedure is fast becoming the popular alternative to bitumen & hot tar, is very much easier to apply and has a considerably longer life, 30 years can usually be expected. The normal method is to strip the old felt & tar surface and fix ľ” exterior plywood or sterling board to the existing roof trusses (do not use any form of chipboard). If removal of the original felt and tar is not possible then the plywood may be formed over the existing roof, ensuring the new roof has adequate falls in order for good drainage and to alleviate the risk of standing water Standard roofs require only one layer of 1˝oz/ sq foot Chopped strand mat + one layer of glassfibre tissue + final flowcoat layer. Roofs bearing constant pedestrian traffic require an extra sheathing of 1˝oz chopped strand mat. Corundum grit or glass grains can be applied with the final flowcoat layer to produce an anti-slip surface. The final flowcoat layer is available ready pigmented white or clear which can be pigmented to a colour of your choice; it also contains a stabiliser to guard against the UV rays of the sun. Pre-formed edging
trims are available as follows in 3 metre lengths(cut
to 1 metre for transporting: Sections C & D are
used when roof adjoins a brick wall. Detailed list of Trims available Here
|
|
|
|
|
|
|
1. Fix GRP pre-formed edging sections, these can be
nailed or screwed.
|
|
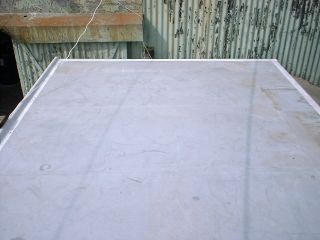
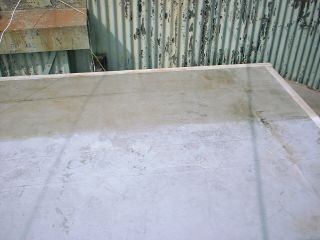
2. When all edging sections are fixed ensure all loose debris, dust, grease etc is removed ready for the resin and glassfibre application |
 |
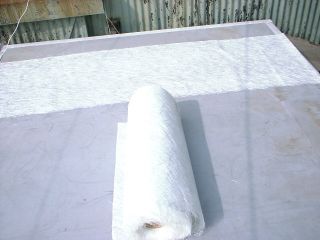 |
3. Roll out and cut all lengths of chopped strand mat (CSM) and glass tissue, ensuring the mat and tissue overlaps the edging section by 2”.
|
|
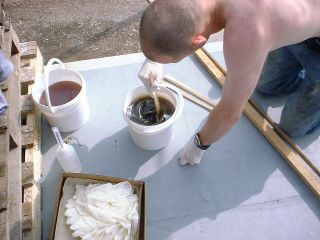
4. Estimate and decant into a bucket the required amount of resin to wet out one length of CSM. For example if the length measures 3 yards approx 3 kilos (litres) will be required. Catalyst additions can be varied slightly according to the ambient temperature, typically at 20şC add 2% (60ml to 3 kilos/litres) mix thoroughly.
|
 |
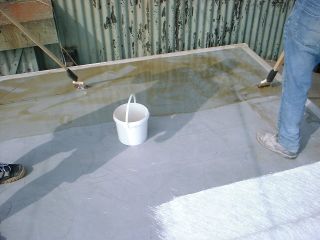 |
5. Spread catalysed resin over complete area to be
covered by first length of CSM.
Immediately apply length of CSM to the
area. Begin rolling with paddle roller to completely wet out the CSM.
When
wetted CSM becomes almost transparent.
If any light patches exist these
must be rolled adding extra resin if required.
|
|
6. When one length is completely wetted out repeat steps 4 & 5 ensuring each length of CSM overlaps the preceding layer by approx 2 inches. Repeat until complete roof area is covered. Allow to cure approx 1-2 hours.
|
 |
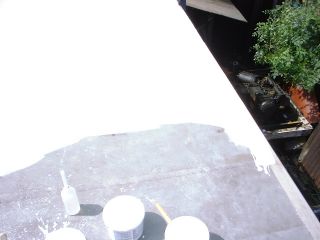 |
7. To apply the final flowcoat layer, simply catalyse
approximately 2 kilos (litres) of flowcoat at a time, spreading with a brush
or roller onto the cured laminate at a rate of approx 70g/2˝oz
per sq foot. Ensure rain doesn’t fall onto the surface at any stage of the job.
|
|
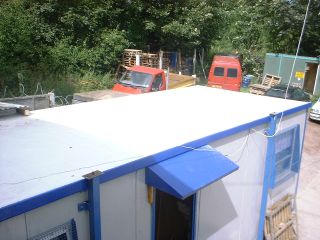
The finished roof fully weatherproofed measuring 24’
x 8’ was completed from start to finish in 7 hours (2 operators) |
 |